Fri Jul 21 2023
Implementing login and authentication for SvelteKit using AWS Cognito
In this article we'll describe how to use AWS Cognito for auth in a SvelteKit project. We will not be using any library such as AWS Amplify. The reason for this is that we want to understand all the steps required, and because external libraries can cause problems when running in Edge environments that doesn't support all of Node.js.
Overall architecture
- We are using the AWS Cognito provided login page (no custom login UI)
- All communication with AWS Cognito is server to server
- Tokens are stored in cookies
Configuring AWS Cognito.
Before we get into the application implementation, we need to configure AWS Cognito.
For this example we'll be using the hosted UI provided by Cognito, however you can implement your own sign in page if you need to.
To configure Cognito you can follow the documentation provided by AWS. Just use the defaults, and see the section below when configuring the app client.
Setting up the app client
Since we are handling all communication with the Cognito API from the server side, we will use the Confidential client option when configuring the App Client during the Cognito setup (see the image below).
Note: For the Hosted UI - Allowed callback URLs section you can use http://localhost:5173/callback/. This can be updated later.
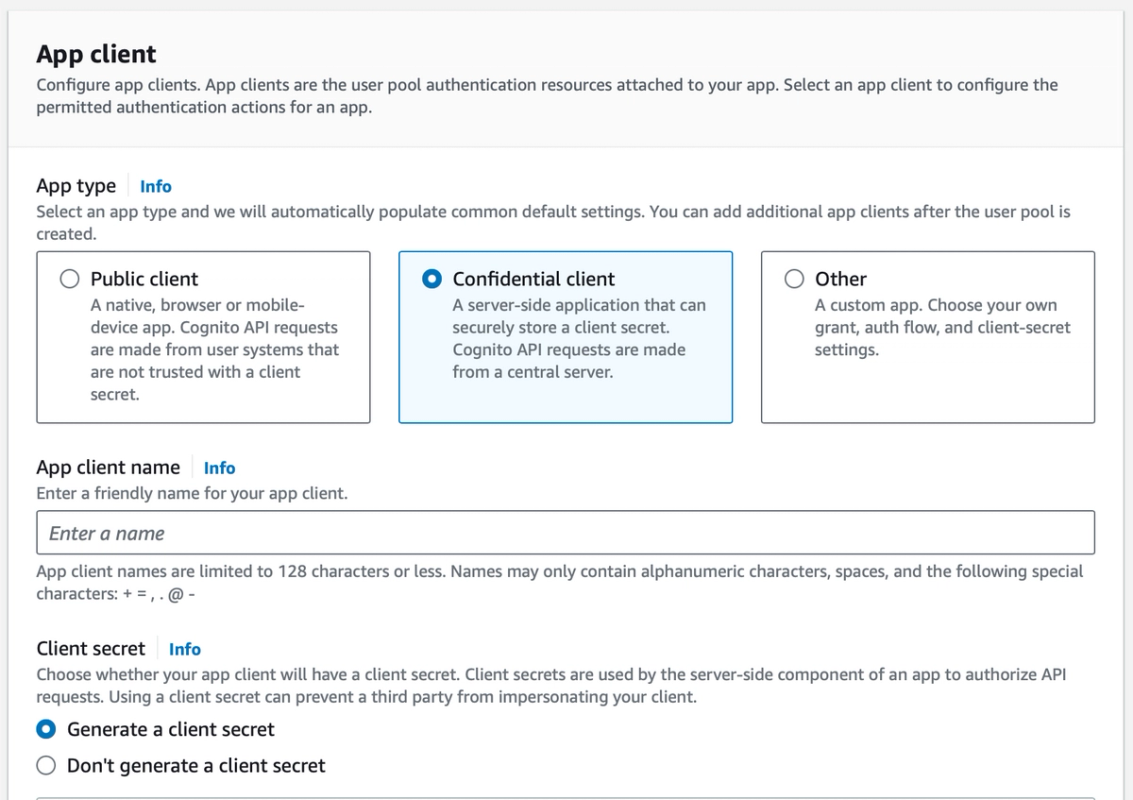
Summary of App client setting
Anything not mentioned below can be left as the default values suggested by the setup wizard.
- App client
- App type - Confidential client
- App client name - [can be anything you want]
- Client secret - Generate a client secret selected
- Leave the rest to default values
- Hosted UI settings
- Allowed callback URLs - http://localhost:5173/callback/
The SvelteKit app
Go ahead and create a basic SvelteKit app as described in the documentation.
There are 4 main subjects we are going to cover.
- Allowing the user to sign in or create a user
- Getting id, access and refresh tokens
- Protecting certain routes/pages
- Updating the id and access token using the refresh token
The basic setup for the SvelteKit project
The project has three routes.
- Home route - (/) Shows a login link and the email of the logged in user
- Callback - (/callback) This is the callback url we used when setting up the App Client in the «Setting up Cognito» section above.
- Server hook - This is a server hook that handles tokens and cookies.
- Protected - (/protected) This route requires a valid token
We will also need some environment variables. Create an .env file and add the variables as follows:
- COGNITO_CLIENT_ID - You'll find this under «App client information» as «Client ID» after you have created the App Client.
- COGNITO_CLIENT_SECRET - Found right below the Client id as «Client secret».
- COGNITO_BASE_URI - This is the «Cognito domain» for your user pool, for under your user pool, App Integration, Configuration for all app clients.
- CF_PAGES_URL - This is the url for the SvelteKit app. Since I'm using Cloudflare this is automatically provided. Locally you can set this to
http://localhost:5173/
Presenting a way for the user to sign in or create a user
Let's start with the root page and add a link for the user to sign in, and display the users e-mail if a user is signed in. Here are the Svelte file and the server side loader function for the home page.
// src/routes/+page.svelte
<script lang="ts">
	import type { PageData } from "./$types";

	export let data: PageData;
</script>

<h1>Auth demo</h1>
<a href={data.signInUrl}>Sign in (or sign up)</a>
{#if data.email}
	<p>Logged in as {data.email}</p>
{/if}
// src/routes/+page.server.ts
import type { PageServerLoad } from "./$types";
import { getSignInUrl } from "./server/helpers";
export const load = (async ({ locals }) => {
const signInUrl = getSignInUrl();
return { signInUrl, email: locals.user?.email };
}) satisfies PageServerLoad;Note: You don't need to generate the sign-in url on the server side, I just like to keep all auth logic on the server side.
The getSignInUrl() function below creates a url to the Cognito domain and the /login path. It passes all the credentials and a redirect url, which decided where to send the user after a successful login.
/**
 * Generate the URL to redirect the user to for signing in.
 * @see https://docs.aws.amazon.com/cognito/latest/developerguide/login-endpoint.html
 */
export function getSignInUrl(): string {
	const baseUrl = env.COGNITO_BASE_URI;
	const clientId = env.COGNITO_CLIENT_ID;

	// The login api endpoint with the required parameters.
	const loginUrl = new URL("/login", baseUrl);
	loginUrl.searchParams.set("response_type", "code");
	loginUrl.searchParams.set("client_id", clientId);
	loginUrl.searchParams.set("redirect_uri", getRedirectUrl());
	loginUrl.searchParams.set("scope", "email openid phone");

	return loginUrl.toString();
}
The getRedirectUrl() function looks like below.
It's really important that this this url exactly matches the url you added to the «Allowed callback URLs» list in the App Client setup, including any trailing slashes!
/**
 * Make sure that the redirect URL is always the same as the one configured in Cognito.
 */
function getRedirectUrl(): string {
	return new URL("/auth-demo/callback/", env.CF_PAGES_URL).toString();
}
If the user clicks the «Sign in (or sign up)» link, they will end up on the Cognito hosted login page. They can create a user or log in.
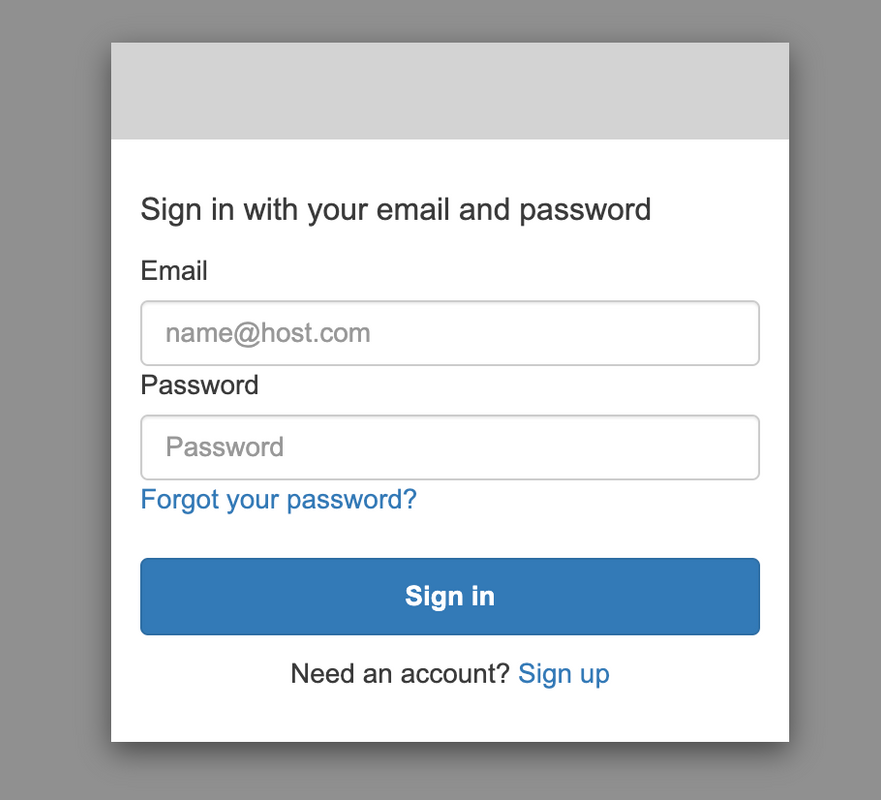
After creating a new user or logging in they are redirected to the url we passed via the redirect_url parameter. That url doesn't exist yet. Let's take a look at this route next.
Handling logins and generating tokens
When the login Cognito page has handled creating the user, or logging the user in, it will redirect to the redirect_url we generated for the login link via the getSignInUrl() function above. The path for this route will be /callback. (This is the url you added to the Allowed callback URLs in the App Client when configuring Cognito).
The callback route is an API route, not a page. It's role is to handle the code passed to it from the Cognito login system and swap it for tokens. This is called a «Authorization code grant» flow, using OAuth terminology.
Let's create the src/routes/callback/+server.ts and see what the steps are for this route.
- The authorization code is passed as a query param called
code. We need to fetch the code and validate that it exists. - We pass the code along with our credentials to the
/oauth2/token/path and get some tokens back. This is done using thegetTokens()function. - Then we store the id token and the refresh token in cookies to be used later (in the server hook).
- Then we redirect back to the home page.
A note on refresh tokens. You might have heard that it's a bad idea to a store refresh token locally on the users machine. This is true, unless you have a revocation strategy, as Cognito does. Refresh tokens can be invalidated at any point in Cognito (via the api or by logging the user out), And, with short lived access and id tokens the refresh token will be validated by Cognito whenever new access and id tokens are requested.
// src/routes/callback/+server.ts
import type { RequestHandler } from "./$types";
import { getTokens } from "../server/helpers";
import { error, redirect } from "@sveltejs/kit";

export const GET: RequestHandler = async ({ url, cookies }) => {
	const code = url.searchParams.get("code");

	if (!code) {
		throw error(500, "No code provided");
	}

	let tokens = null;
	try {
		tokens = await getTokens({ code });
	} catch (e) {
		console.error(e);
		return new Response(JSON.stringify(e), { status: 500 });
	}

	if (tokens && tokens.access_token && tokens.id_token && tokens.refresh_token) {
		// Set the expire time for the refresh token
		// This is set in the Cognito console to 30 days by default
		// so we'll use 29 days here.
		// When the refresh token expires, the user will
		// have to log in again
		const refreshExpire = new Date();
		refreshExpire.setDate(refreshExpire.getDate() + 29);
		cookies.set("refresh_token", tokens.refresh_token, {
			path: "/",
			expires: refreshExpire
		});

		// Get the expire time for the id token
		// and set a cookie.
		const idExpires = new Date();
		idExpires.setSeconds(idExpires.getSeconds() + tokens.expires_in);
		cookies.set("id_token", tokens.id_token, { path: "/", expires: idExpires });

		// Redirect back to the home page
		throw redirect(307, "/");
	} else {
		return new Response(JSON.stringify(tokens), { status: 500 });
	}
};
Now, let's take a look at the getTokens() function.
This function can handle both generating the initial tokens using an authorization code, as well as taking a refresh token and fetching updated id and access tokens. We'll see how to refresh the tokens using this function later when we implement the server hook.
interface Tokens {
	access_token: string;
	id_token: string;
	token_type: "Bearer";
	expires_in: number;
	refresh_token?: string;
}

interface TokenPayload {
    // Are we passing an auth code or a refresh token
	grant_type: "authorization_code" | "refresh_token";
	client_id: string;
	client_secret: string;
	redirect_uri: string;
	code?: string;
	refresh_token?: string;
}

interface TokenOptionsCode {
	code: string;
	refreshToken?: never;
}

interface TokenOptionsRefresh {
	code?: never;
	refreshToken: string;
}

type TokenOptions = TokenOptionsCode | TokenOptionsRefresh;

/**
 * This function can either generate tokens from a code or from a refresh token.
 * If a code is provided, this all tokens is generated (requires a fresh login)
 * If a refresh token is provided, only the access/id token is updated.
 * @see https://docs.aws.amazon.com/cognito/latest/developerguide/token-endpoint.html
 */
export async function getTokens(options: TokenOptions) {
	const baseUrl = env.COGNITO_BASE_URI;
	const clientId = env.COGNITO_CLIENT_ID;
	const clientSecret = env.COGNITO_CLIENT_SECRET;

	// Generate the Authorization header value (basic auth) using the client ID and secret.
	const authHeader = btoa(`${clientId}:${clientSecret}`);

	// The token api endpoint.
	const url = new URL("/oauth2/token/", baseUrl);

	// BodyObject
	const bodyObj: TokenPayload = {
		// If a code is passed, use the authorization_code grant type.
		// If a refresh token is passed, use the refresh_token grant type.
		grant_type: options.code ? "authorization_code" : "refresh_token",
		client_id: clientId,
		client_secret: clientSecret,
		redirect_uri: getRedirectUrl()
	};

	// Add the code or refresh token to the body object depending on the options.
	if (options.code) bodyObj.code = options.code;
	if (options.refreshToken) bodyObj.refresh_token = options.refreshToken;

	// Serialize the body object to a string.
	const body: string = Object.entries(bodyObj)
		.map(([k, v]) => `${k}=${v}`)
		.join("&");

	// Make the request and return the response.
	const response = await fetch(url.toString(), {
		method: "POST",
		headers: {
			// The headers as defined in the Cognito docs.
			"Content-Type": "application/x-www-form-urlencoded",
			Authorization: `Basic ${authHeader}`
		},
		body
	});

	return (await response.json()) as Tokens;
}
Protecting routes and refreshing tokens
The last part of (this long ass article) is the server hook handle function. The server hook is a SvelteKit specific feature, in other frameworks you might know it as middleware. We'll define the hook at src/hooks.server.ts and implement the handle function.
This function runs every time the SvelteKit server receives a request — whether that happens while the app is running, or during prerendering — and determines the response.
We'll use the hook for several tasks:
- Read the id token cookie (if it is set) and parse it.
- Set the email address in the locals object, to make it available the load function for pages that have a server load function.
- For any route or page which requires the user to be logged in (this applies to anything under
/protectedin this example)- Check if the id token still exists
- If not, get the refresh token
- If we have the refresh token, create a new id token and update to cookie
- If the refresh token does not exist, sign the user out and show the login page
Here's the code for the server hook handle function:
/**
* For the parseJWT function you can use any npm JWT library
* or one line of js:
* JSON.parse(Buffer.from(token.split(".")[1], "base64").toString());
**/
import type { Handle } from "@sveltejs/kit";
import { parseJwt } from "./routes/auth-demo/server/utils";
import { getTokens, getSignOutUrl } from "./routes/auth-demo/server/helpers";
import { redirect } from "@sveltejs/kit";

export const handle = (async ({ event, resolve }) => {
	// Try to get the id token from the cookie
	const rawIdToken = event.cookies.get("id_token");
	if (rawIdToken) {
		// If the id token exists, parse it and add it to the locals
		const idToken = parseJwt<{ email: string; exp: number }>(rawIdToken);
		event.locals.user = { email: idToken.email };
	}

	// Handle protected routes
	if (event.url.pathname.startsWith("/protected")) {
		// If the user is not logged in (no id token)
		if (!event.locals.user) {
			// Get the refresh token
			const refreshToken = event.cookies.get("refresh_token");
			if (!refreshToken) {
				// if the refresh token doesn't exist
				// redirect to sign out and sign in again
				const signOutUrl = getSignOutUrl();
				throw redirect(307, signOutUrl);
			}

			try {
				// Try to update the tokens
				const updatedTokens = await getTokens({ refreshToken: refreshToken });
				// Update the cookie for the id token
				const idExpires = new Date();
				idExpires.setSeconds(idExpires.getSeconds() + updatedTokens.expires_in);
				event.cookies.set("id_token", updatedTokens.id_token, { path: "/", expires: idExpires });

				// And the locals
				const idToken = parseJwt<{ email: string; exp: number }>(updatedTokens.id_token);
				event.locals.user = { email: idToken.email };
			} catch (error) {
				// If the refresh token is invalid
				// redirect to sign out and sign in again
				const signOutUrl = getSignOutUrl();
				throw redirect(307, signOutUrl);
			}

			// Carry on
		}
	}

	const response = await resolve(event);
	return response;
}) satisfies Handle;
Any page or route under /protected will now require a valid token.
The getSignOutUrl function looks like this:
export function getSignOutUrl(): string {
	const baseUrl = env.COGNITO_BASE_URI;
	const clientId = env.COGNITO_CLIENT_ID;

	const logoutUrl = new URL("/logout", baseUrl);
	logoutUrl.searchParams.set("response_type", "code");
	logoutUrl.searchParams.set("client_id", clientId);
	logoutUrl.searchParams.set("redirect_uri", getRedirectUrl());

	return logoutUrl.toString();
}
Final thoughts
This is an example application, hence it's not a complete production ready ...thing. You would need obvious stuff like a way for the user to sign out (use the /logout endpoint) and better error handling, UI for displaying error situations, passing a state to redirect the user to the correct page and so on. These things are not in the scope of this article, you can probably figure them out if you have gotten this far.